Pre-Requisites
What you need in place before integrating the Mobile SDK: an Advanced Payments account and its credentials, plus wallet-specific setup if you intend to offer Google Pay or Apple Pay.
Advanced Payments merchant account
To begin integrating your app with the Advanced Payments platform (AP), you will need to first sign up for an Explorer test account, which gives you access to our test environment and enables you to configure, test and fine-tune your integration in a safe, non-production environment.
Your Explorer account gives you the following capabilities:
- Access our Merchant Integration Test Environment (MITE) and submit test card transactions to our RESTful API
- View your transactions in our Merchant Portal to analyse your payments and perform manual refunds
- Experiment with a number of integration methods including fully hosted and PayPal payments
In order to handle your requests securely and reliably, you will need to submit credentials specific to your organisation with each request. You will also be issued with at least one installation identifier. You will need to incorporate these credentials into your mobile application using the SDK.
After account creation, two sets of credentials will be assigned: username, password and installationId. These credentials are essential: they are used to access the Advanced Payments API directly, and in the Mobile SDK to generate the authentication token. Each set is used to access either the MITE (test) or LIVE environment.
Google Pay
If you wish to enable the Google Pay payment method, please refer to our integration team for enabling it.
Setup
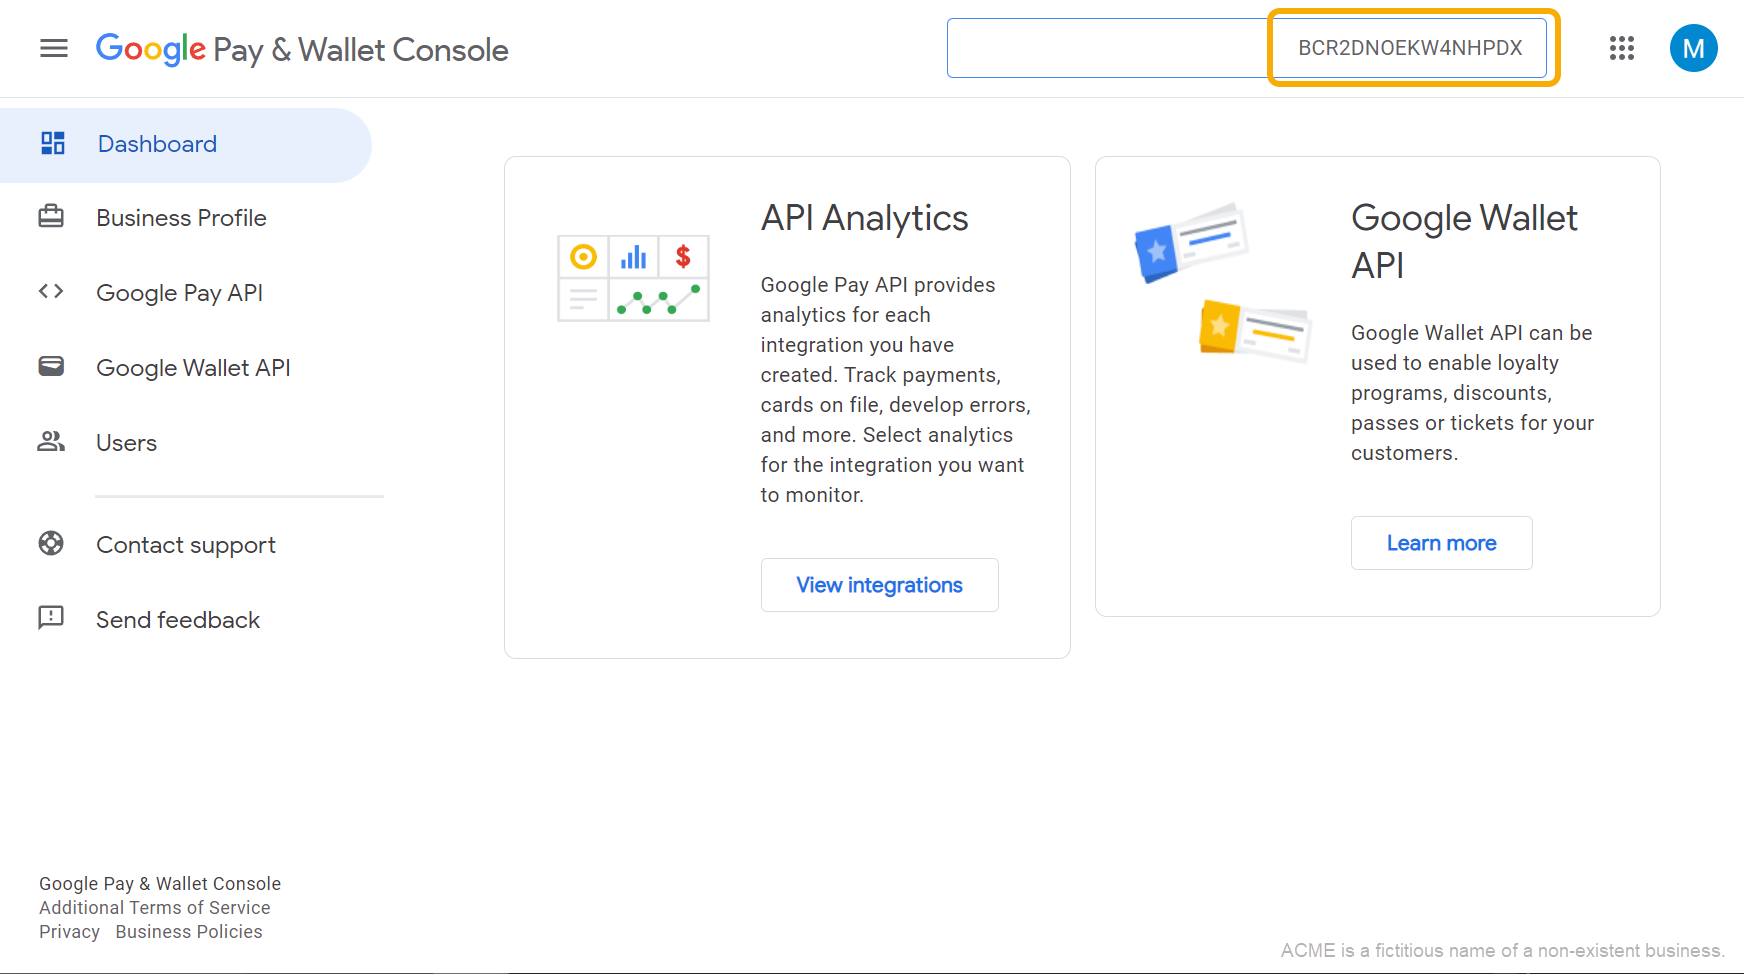
You will need to provide your Payment Profile ID, located in the Google Pay portal — usually in the top right corner, starting with BCR.
Apple Pay
If you wish to enable the Apple Pay payment method, please refer to our integration team for enabling it.
Create an Apple Pay payment processing certificate
This has to be done for each environment — MITE (test) and LIVE.
Create a merchant identifier
The following is extracted from the Apple Pay configuration documentation. A merchant identifier uniquely identifies you to Apple Pay as a merchant who is able to accept payments. A merchant identifier never expires, and you can use the same one for multiple apps.
- In Certificates, Identifiers & Profiles, click Identifiers in the sidebar, then click the add button (+) on the top left.
- Select Merchant IDs, then click Continue.
- Enter the merchant description and identifier name, then click Continue.
- Review the settings, then click Register.
Alternatively, you can create a merchant identifier in Xcode.
Create a payment processing certificate
A payment processing certificate is associated with your merchant identifier and used to encrypt payment information. The payment processing certificate expires every 25 months. If the certificate is revoked, you can recreate it.
- In Certificates, Identifiers & Profiles, click Identifiers in the sidebar.
- Under Identifiers, select Merchant IDs using the filter on the top right.
- On the right, select your merchant identifier.
- Under Apple Pay Payment Processing Certificate, click Create Certificate.
- Request a certificate signing request using the endpoint below.
Request processing certificate signing request
| Environment | URL |
|---|---|
| MITE (TEST) | https://api.mite.pay360.com |
| LIVE | https://api.pay360.com |
Request a processing CSR
POST /acceptor/rest/applepay/{instId}/processingCsrcurl -X POST "{targetEnvironmentPath}/acceptor/rest/applepay/{instId}/processingCsr" \
-u "{apiUser}:{apiPassword}"HTTP/1.1 200
Content-Type: application/x-pem-file
-----BEGIN CERTIFICATE REQUEST-----
MIHYMH8CAQAwHTEbMBkGA1UEAxMSYXAuZGV2LmV4YW1wbGUuY29tMFkwEwYHKoZI
zj0CAQYIKoZIzj0DAQcDQgAEXGRIw23fV0LllTafRR+E6cf7SX0p0O1ZelUvbNuc
3WJ16uqfvqxTZarjROElLI8/naT+sf4+C+nnxmQLRhb0aqAAMAoGCCqGSM49BAMC
A0kAMEYCIQC8mkmYbFxj6uvqVVfDHY3JBD9jGTIs5/fP0apnU5V4fwIhAMpyYSju
jMTqFkyVk8eCyLJ66vxGcMVWrl2cs97bM2jB
-----END CERTIFICATE REQUEST------ Send no request body — there is no
Content-Typeto set. - The CSR comes back as
application/x-pem-file, not JSON.
- Click Choose File, and in the dialog that appears select the certificate generated by our API.
- Click Continue.
- Click Download.
- Upload the downloaded pkix certificate from the Apple Developer Console to our API using the endpoint below.
Upload Apple Pay processing certificate
| Environment | URL |
|---|---|
| MITE (TEST) | https://api.mite.pay360.com |
| LIVE | https://api.pay360.com |
Upload the signed certificate
POST /acceptor/rest/applepay/{instId}/processingCert[binary file content]curl -X POST "{targetEnvironmentPath}/acceptor/rest/applepay/{instId}/processingCert" \
-u "{apiUser}:{apiPassword}" \
-H "Content-Type: application/pkix-cert" \
--data-binary "@signed-processing-certificate.cer"HTTP/1.1 200- The request body is the certificate Apple signed, sent with a
Content-Typeofapplication/pkix-certrather than JSON.
Sandbox testing
Please refer to Apple Pay sandbox testing.